|
The Aquabot Motor RevealedSo many e-mails asking about the Aquabot motor internal wiring and the oil inside. I am surprised by the volume of Aquabot owners literally doing open heart surgery on their robot. If not done properly, you risk an oil slick in your swimming pool. Aqua Products does not recommend opening the motor. User serviceable parts are minimal. Scroll down for photos. If you break one or both green wires from the terminal well, my only suggestion would be to drill 2 new holes and sealing with epoxy. If anybody has a better idea besides a trip to the garbage can...I am all ears.
If you successfully repair your motor, you must be certain the motor is sealed and clean. If you must disassemble the Aquabot motor, do it in a flat bottom bowl to catch any spillage. In any case the surface must be oil proof. There is a considerable amount of oil in the motor. The motor is filled with 12 ounces or about 1 1/3 cup of 30 weight, non-detergent auto oil and the mess begins as soon as the top is removed. I have been advised by Aqua Quality Pools that compressor oil, found at hardware and home stores, is a better oil for this application. Mineral oil may also be used. Wipe the gasket surface clean before reassembly. After the top is screwed in place, clean the entire exterior with an oil busting cleanser. DO A BUCKET TEST BEFORE INSTALLING To prevent an oil slick in your pool, I suggest a bucket test...submerge the motor in a bucket of water for at least one day to check for oil leaking. Be certain the exterior of the motor has been thoroughly cleaned.
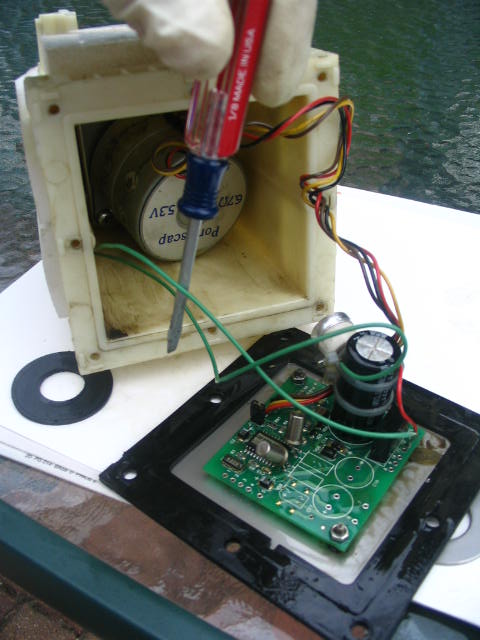
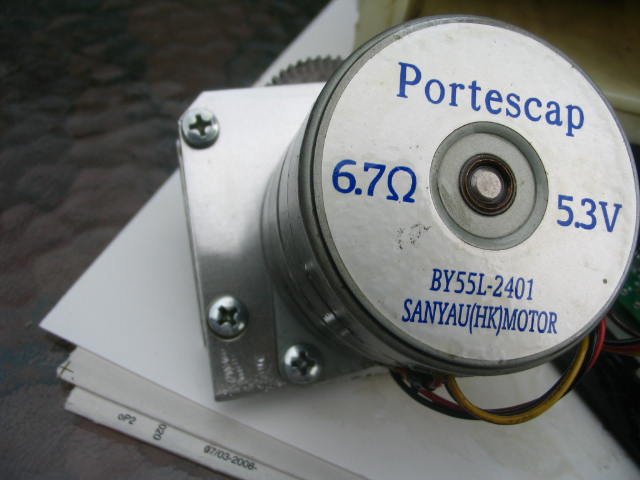
This page, in text and photos will cover wiring, oil and gearing. NEEDLE NOSE PLIERS are a MUST! This is the Aquabot Turbo motor.
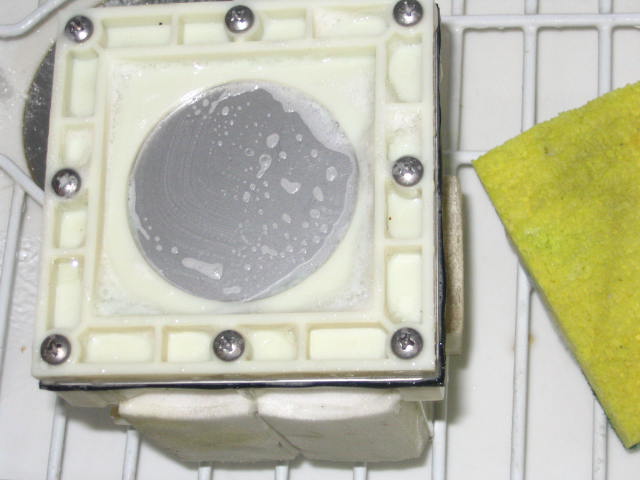
Remove the 8 screws, lift off the top. The oily mess starts here.
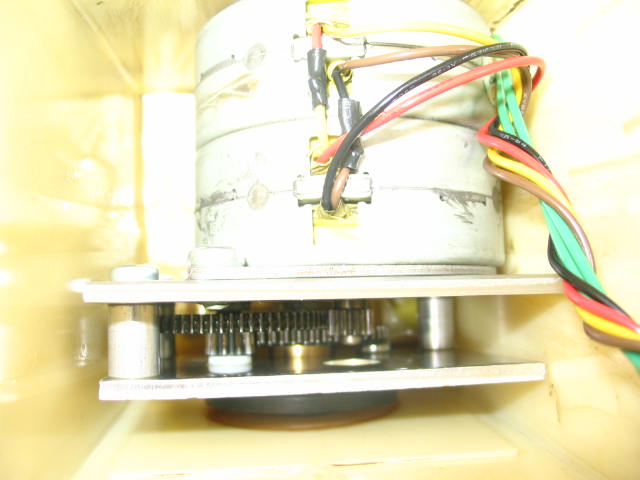
Several up-close photos of the circuit board and wiring. The circuit board is immersed in the oil.
The Aquabot motor is filled with automotive 30 weight oil, 1 1/3 cups, about 11 ounces.
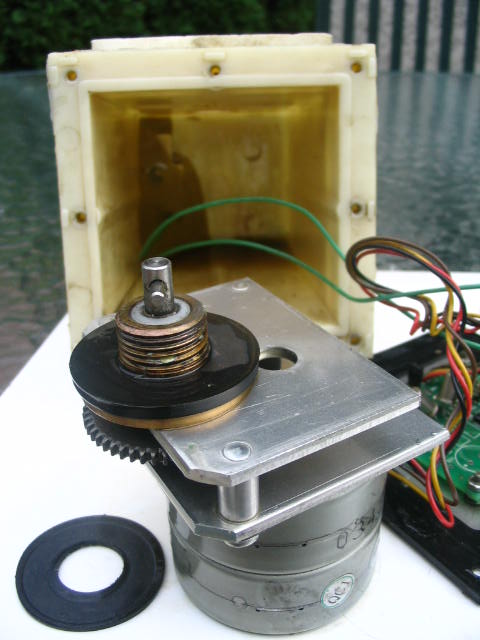
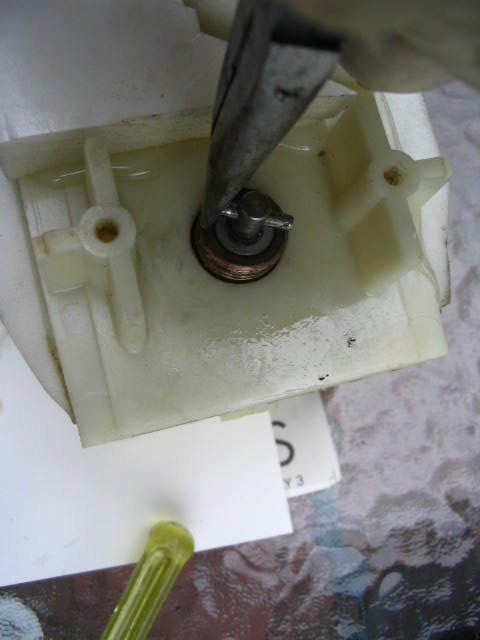
I used a 15/16 wrench to remove the axle nut. Genly pry off the washer and rubber gasket.
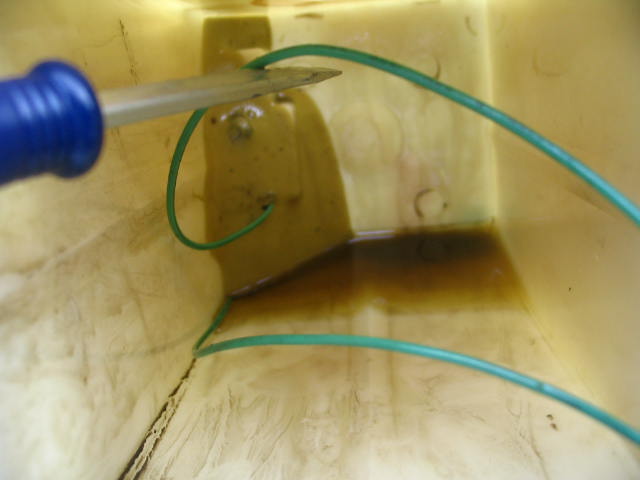
This is the inside view of the motor and gear assembly. WARNING WARNING WARNING Before removing the motor, unbraid the green wires The green wires go to the bottom of the casing, attaching to the terminals. They are quite long when un braided. If they break it is trouble.
After the 2 GREEN wires are straight, pull the motor gently by the wires while pushing the drive axle into the housing. Be patient, the motor really does slide out. DO NOT pull the wires too hard. If the motor does not lift out easily use needle nose on the gear assembly.
Do what you have to do, I suggest only working on the gear assembly. Be careful not to stress the wiring. Slide the motor into the case.
You MUST have a pair of needle nose pliers to pull and guide the axle thru the hole while gently pushing the back side of the motor with your fingers. make absolutely certain the green wires are clear of the motor pressing against the case.
Put the rubber gasket and washer on the axle and screw on the nut. Clean the gasket surface and screw the cap onto the top using 8 screws. Oil may squeeze from the gasket. Wipe clean and wash the entire motor with oil busting detergent.
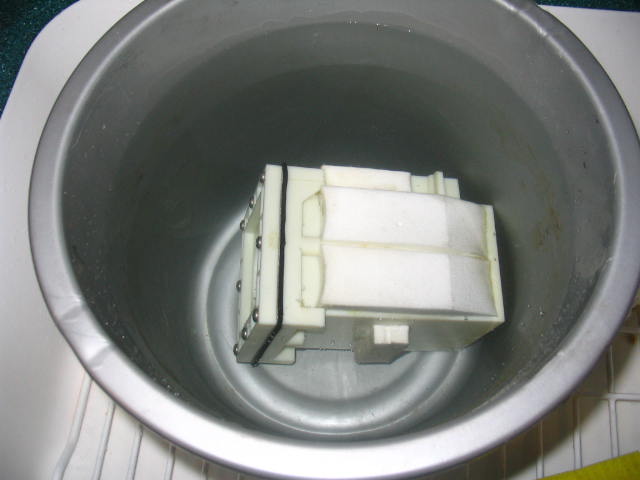
Submerge the clean motor in a water filled bucket to check for leaks.
|